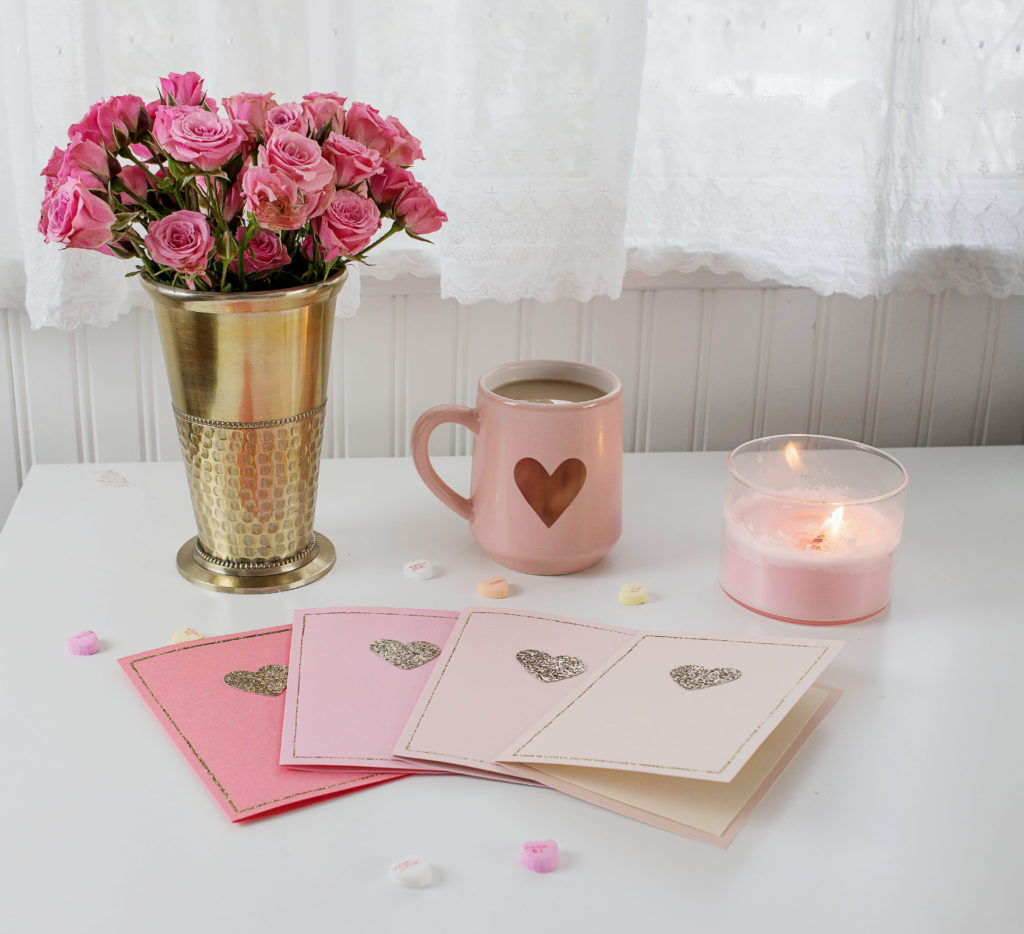
Is it just me or has the price of greeting cards gotten ridiculously expensive? Even the mediocre ones are $5. I make my own cards quite a bit and figured I would do so for Valentine’s Day.
I don’t like overly sappy sentiments on my greeting cards so I went with a very simple design that I think looks more expensive than the approximately 50 cents it cost to make them.
The supplies I used are:
- Various shades of 12″ x 12″ pink card stock
- Cream printer paper (heavier weight than typical printer paper)
- Gold glitter card stock
- Gold glitter glue
- 1 7/8″ heart paper punch
- Adhesive dots
- Scoring board
- Paper cutter
I made my cards standard A6 size (4.5″ x 6.25″) which was a mistake. I should have made them 6″ tall so I could get two cards out of each 12″ x 12″ sheet of card stock. I doubt anyone would notice the 1/4″ difference. My instructions will be for the more economical way. You can either make your own envelopes or just use standard A6 envelopes.
Cut 12″ x 12″ card stock into two 9″ x 6″ pieces. Using scoring board lay the paper lengthwise and score at the 4 1/2″ mark and then fold at the score mark.
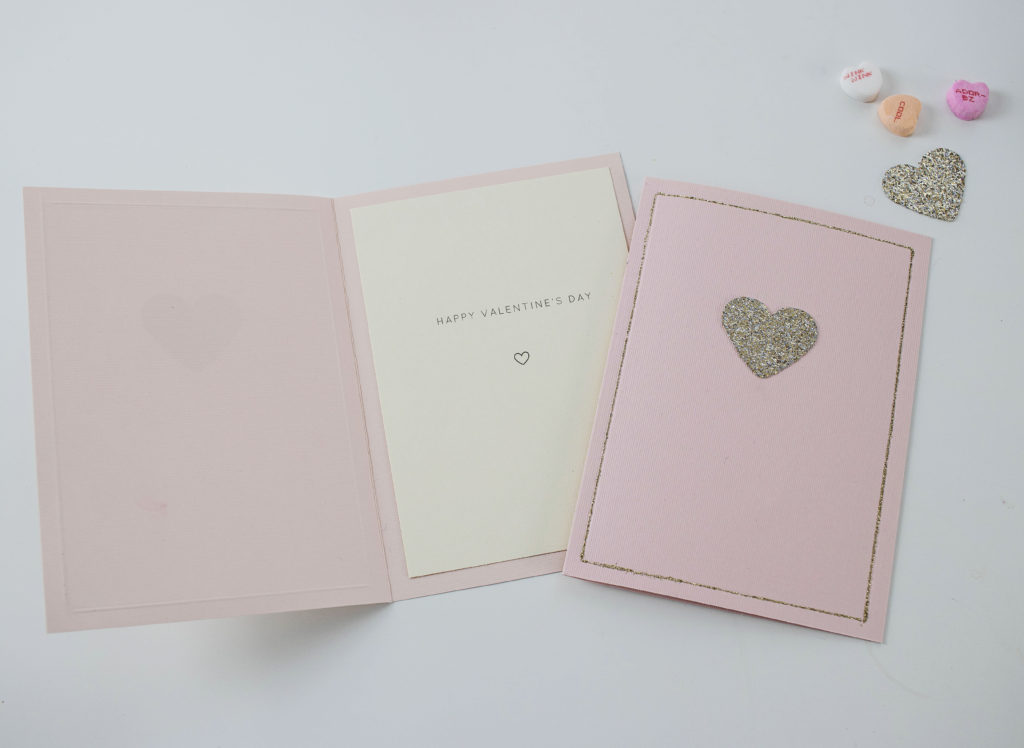
This next step is optional but it helped in keeping the glitter frame on the card nice and straight. Score 1/4″ away from each edge on the front of the card, making sure to start 1/4″ down and stop 1/4″ from the bottom. If you look at the picture of the open card above you can see the scorelines on the inside of the card. Not only does it help keep your glitter lines straight it also makes the card look a little more polished on the inside.
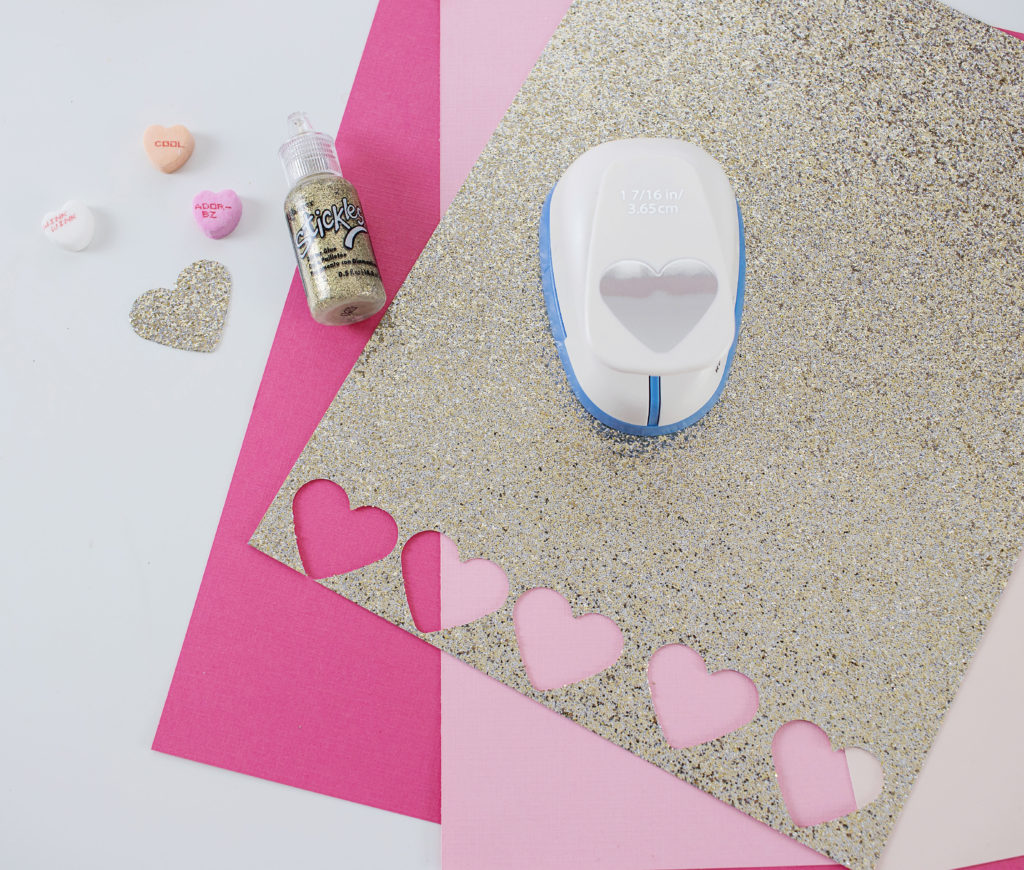
Cut out heart shapes from the glitter card stock. A quick note on the glitter card stock. Try to match your card stock to your glitter glue as close as possible. I also liked the chunkier glitter card stock for this project. Cover the back of the hearts with the adhesive dots (which come on a runner or dispenser…) and apply to the front of the card.
For the inside of the card I printed the simple sentiment “Happy Valentine’s Day” and included a tiny heart below it using Microsoft Word. You can get four card interiors from one sheet of 8 1/2″ x 11″ paper. Cut each interior to 4″ x 5 1/2″ . The font I used is Quicksand and I expanded the text to 1.8 pts. (you do this from the advanced tab in the font options box). I really like the Quicksand font because it is nice and clean.
Put a strip of adhesive dots along the top of the backside of the interior sheet and adhere it to the inside of the card, centering it so there is 1/4″ space around the edges.
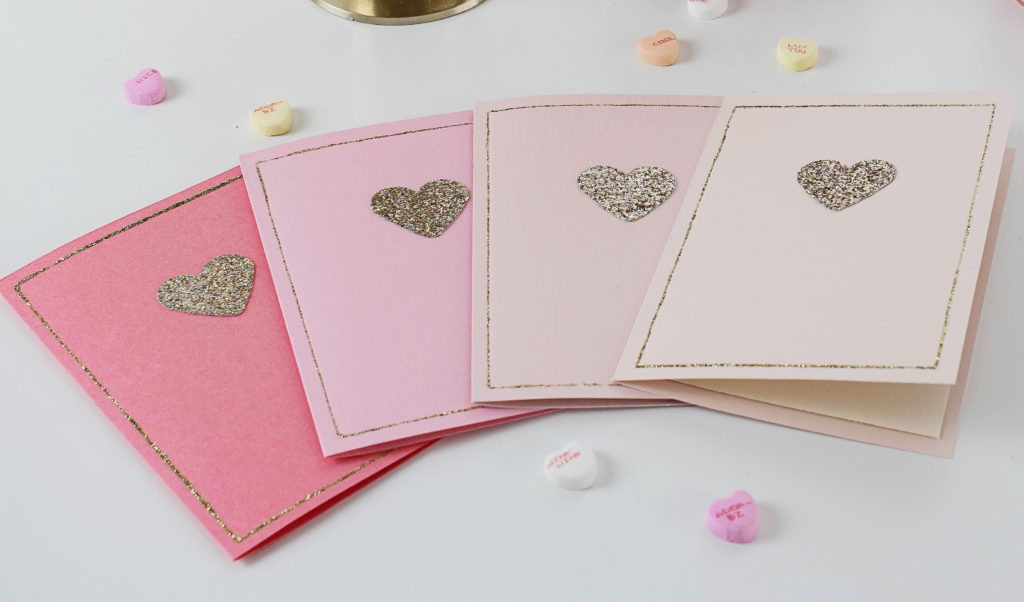
The last step is to make a glitter line around the front of the card with the glitter glue, using the scorelines as your guide. I also used a folded piece of scrap card stock places right next to the score line to help keep the tip of the glitter glue from veering off course. Let the glitter glue dry and it’s done!
Honestly it took longer to type up the instructions than to make the cards themselves (minus the glue drying time). I went with pink for the cards but it would be striking on black or red too.
And just because I like a challenge I decided to make a little video of the process. Please ignore the crypt keeper hands and the tea stain on my desk.
Some props may have been eaten in the making of this blog post.

Adorable cards! Love the video, you make it look so easy. Crypt keeper hands…so funny! Maybe you’ve found your next career, online craft instructor!
If I don’t find a job soon I may have to! 🙂