• Skip to primary navigation
  • Skip to main content
  • Skip to primary sidebar
  • Home
  • Catagories
    • Books
    • Crafts
    • Dollhouse
    • Favorites
    • Food
    • Garden
    • Holidays
    • House
    • Musings
    • Organize
    • Places
    • Shopping
  • Contact
  • Nav Widget Area

    • Email
    • Instagram
    • Pinterest

Under a Blue Moon

Decor, cooking, organization, all the pretty things

Content/Sidebar/Sidebar

Jammy Dodgers

Jam filled cookies

I admit I made these cookies because the name kind of delights me.  I don’t even know where I heard of them.  From what I understand they are a British child’s delight and are readily available at your local grocer, provided you live in the UK.  I thought they looked an awful lot like Linzer cookies (a longtime favorite) but the recipe for the cookie is a bit simpler.

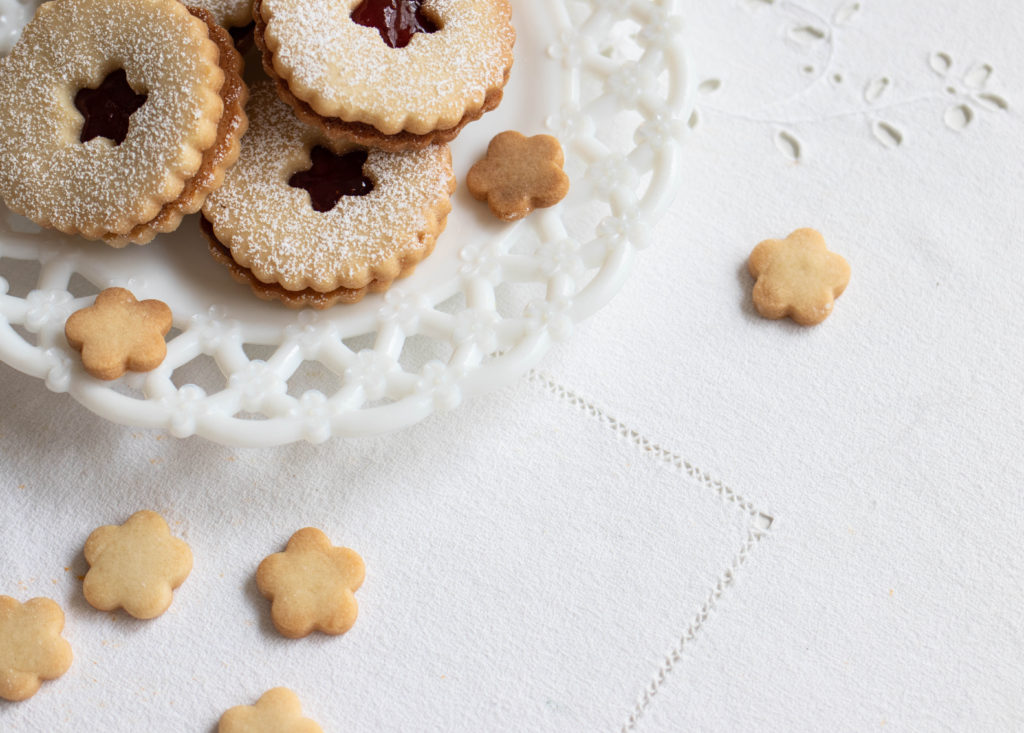
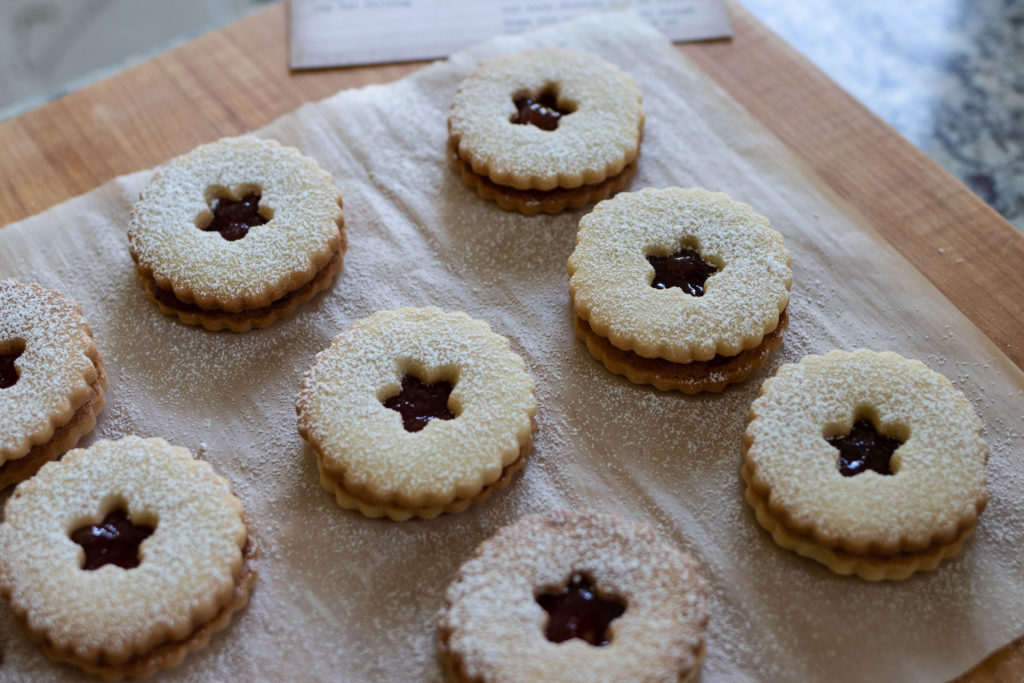
I think the main difference is the use of powdered (or confectioner’s) sugar instead of granulated sugar which makes the cookie a bit more delicate in the Jammy Dodgers.  Other than a few slight variations in the recipe, the cookie assembles and looks pretty much the same.  Two cookies, jam in the middle with a pretty peek of it from the top cookie.

Instead of the traditional heart shape for both the Jammy Dodger and the Linzer cookie I went with a floral motif for the cutout.  I’m celebrating all things Spring and what better way than with a cookie?

Save those little floral cutouts!  They make lovely teeny cookies on their own.   Plus they are so teeny they don’t count, calorie-wise, when you eat them.  It’s like celery – it takes more energy to eat them than are in the cookie themself*.

*Not scientifically proven.  Yet.

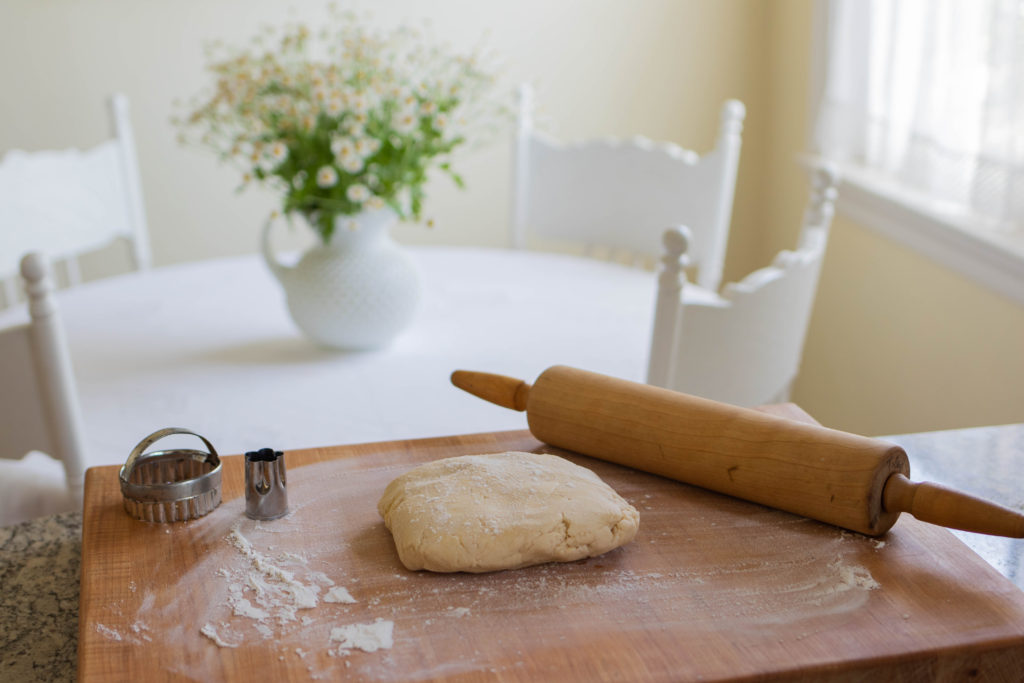
Another bonus to these cookies is that they come together FAST.  I got the notion to make these two hours before we were set to leave for a dinner date and managed to make a batch which included blog photo taking breaks and chilling time for the dough.  The recipes makes a dozen  2 1/2″ cookies (consisting of two cookies sandwiched together) with a bunch of little flower cut outs as extras.

If you want to be extra fancy you could make your own jam filling but I just used pre-made.

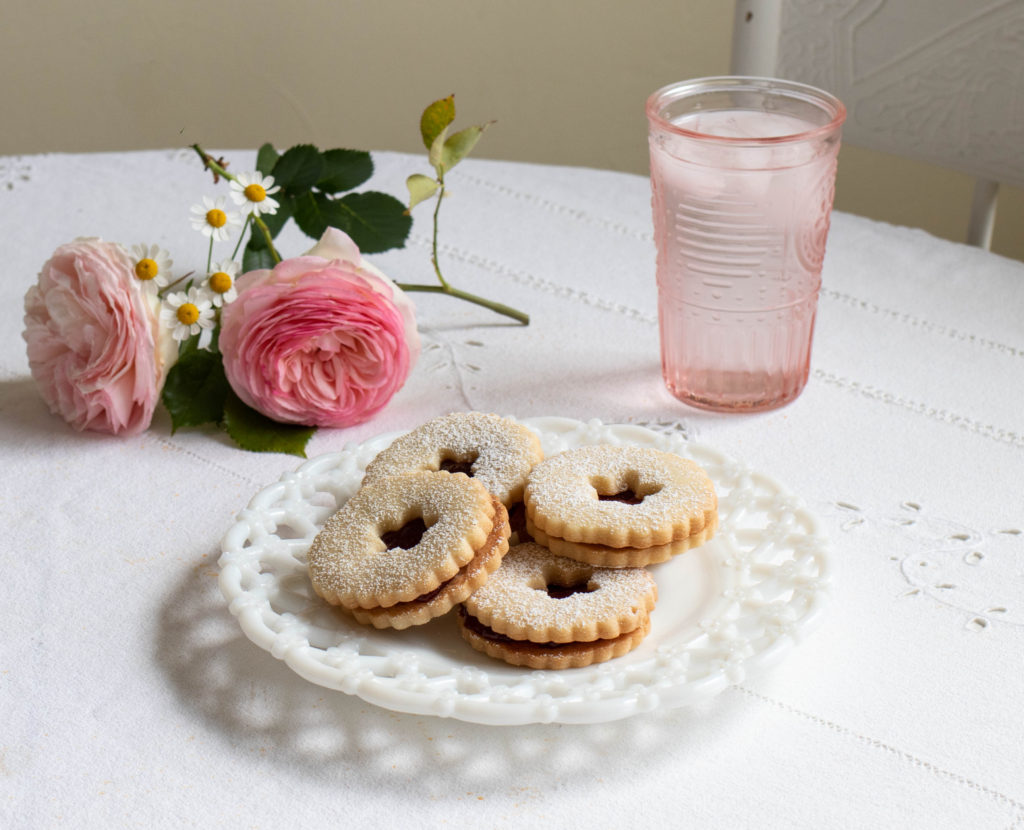
I was going to say this would be the perfect tea party cookie but honestly it’s the perfect “I need to renew my car registration” cookie.  Or the “It’s 11:00am and I’m surviving the day” cookie.  For a tough day you may want to double the recipe.

I have no idea how they store because they never last that long around here.

Cookies on plate

Jammy Dodgers

Print Recipe
Servings: 12 assembled cookies
Course: Dessert
Ingredients Method

Ingredients
  

  • 250 g all purpose flour
  • 200 g room temperature salted butter
  • 100 g confectioner's sugar
  • 1 egg yolk
  • Jam for filling

Method
 

  1. Preheat oven to 340 degrees F.
  2. Add the butter and sugar to a stand mixer or mixing bowl. Cream until light and fluffy.
  3. Add the flour and mix until the dough resembles course meal.
  4. Add egg yolk and mix until the dough comes together.
  5. Place dough in cling film and chill in refrigerator for 30 minutes.
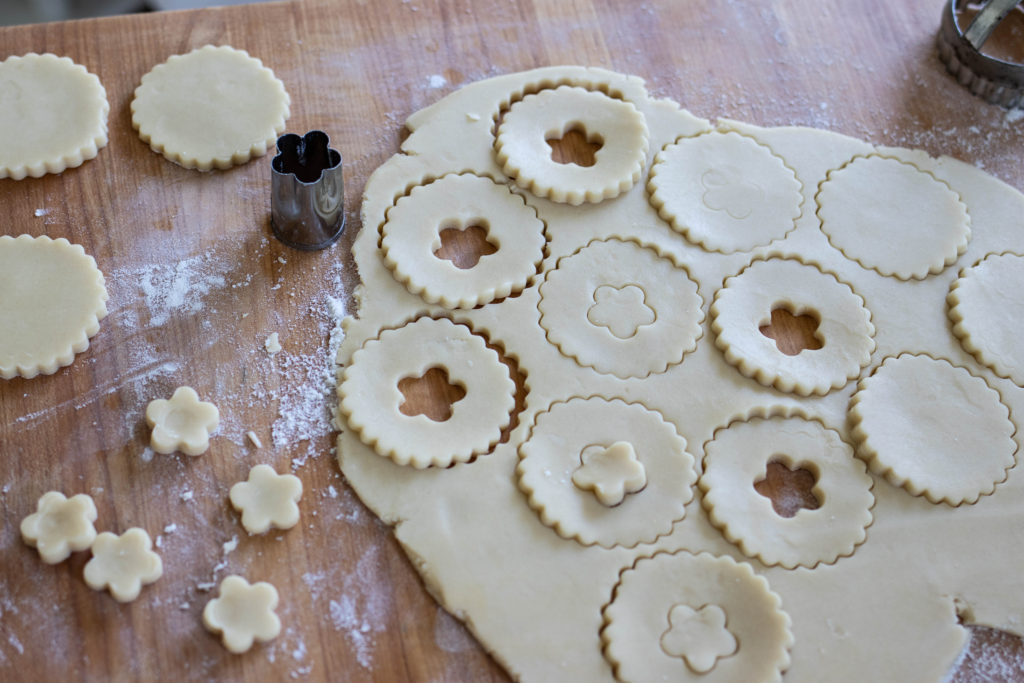
  6. Turn the dough out onto a floured surface and roll out to 1/3 inch thick.
  7. Using a 21/2 inch fluted cookie cutter cut out the cookies. Using a smaller cutter, cut out the centers of half of the cookies.
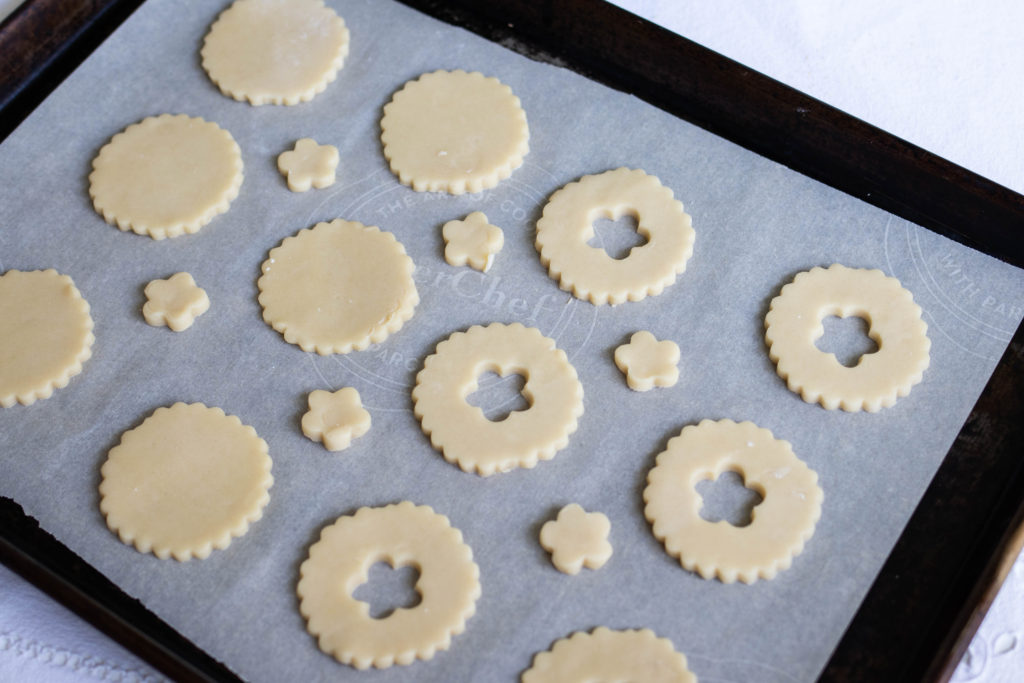
  8. Place them on a parchment covered baking sheet.
  9. Bake 12-13 minutes until they start to turn golden brown on the bottom.
  10. Allow to cool completely.
  11. Once cooled, take a cookie without a cut-out and spread a scant teaspoon of jam.
  12. Top with a cut-out cookie.
  13. Sprinkle with confectioner's sugar


May 8, 2019 10:41 am Andrea Filed Under: Food

Dollhouse: Wing back chair

1:12 scale chair

This post will be a bit of a quasi tutorial and lessons learned along the way.  Sometimes you have to make something a few times before you get it right.

I saw this wing back chair image on Pinterest and was thoroughly charmed by it.   I followed it to the original blog post on Cinderella Moments where the blogger links to a pdf of a pattern for the chair.  It’s actually the assembly instructions for a kit but it essentially includes a template of the chair parts.

I thought I would have a go at it and I will say my results were mixed.  And after looking at the chairs Cinderella Moments created I’m tempted to think she may have played with the scale a bit.  Which is what I did the second time around.   Let me show you what I mean.

dollhouse chairs

The chair on the right is my first attempt using the template as is.  It looked too skinny and too tall.   I made some modifications to the height of the back and sides as well as how I assembled it.

I also switched up the material used for the chair parts.  In the first attempt I used a thin sheet of bass wood for the pieces.  I then painted them white because I didn’t want the tan of the wood showing through the white upholstery material.  Painting caused the pieces to curl a bit.  On the second chair I used chipboard, which in addition to not warping, was easier to cut out with my X-Acto knife.

Side note:  It wasn’t until well in assembly that I remembered that I needed two back pieces.

I couldn’t find a sheet of chipboard at my local craft store but I did find a package of chipboard tags that worked just fine.

In order to pad the back and seat I bought an inexpensive sponge from the $1 store.  I had to cut away the scrubby part but it worked out perfectly.  Again – lesson learned from the first one was to use foam instead of multiple layers of batting.  The seat in the first attempt just didn’t have enough loft.  I did cover the sponge with one layer of batting (actually it’s the stuff you use for hot pads or oven mitts) just to hide the yellow.

In the next picture you can see the various stages of covering the chair parts.

The material I used to cover the chair is a vintage hand towel that had a few holes in it so I didn’t mind sacrificing it.  I love the scale of the diamond shapes of the weave.

Another tip – starch the heck out of your fabric before cutting out.  It made it much easier to cut and to glue into place.

In addition to the damaged tea towel I used I also used the legs off of the cheap dollhouse furniture my friend gave me.  There was no salvaging the chair itself because the proportions were weird, not to mention it was cheaply made, but the legs could be reused.

I removed the legs and sprayed them with a shellac primer (remembering the awful red bleed through when I was painting some of the other pieces) then painted them with some acrylic paint I had on hand.  A little trick I used to paint the legs was to lay down some double sided tape and the tape the legs upside down so I could paint the visible sides easily.

Of course not everyone is going to have a stash of crappy dollhouse furniture to pillage for parts but you can find 1:12 scale dollhouse furniture parts easily.

I used a vintage hankie that had some staining, so thereby could be used as scrap, to add some trim to the chair and to create a lumbar pillow.   Save those less than perfect vintage pieces because you never know when they  might come in handy.

The thing about restoring a dollhouse I love the most is creating the furnishings.  Are they perfect?  No.  But I love the creative process in making them.

If you want to attempt to recreate this chair here is a link to the template I tweaked.   If you print the template on an 8 1/2″ x 11″ piece of paper it will be to scale.  I just have the template and not the instructions but I think you can figure it out by looking at the pictures.  If you have any questions about how I assembled the chair let me know in the comments and I’ll get back to you.


May 6, 2019 12:01 am Andrea Filed Under: Crafts, Dollhouse

Friday Favorites

Pale blue photo mosaic

lyrical ◊ Every day is like Sunday ◊ sea oats on the dunes ◊ map

  • Pretty Instagram feed:  @timeworn_white
  • I love a good before & after
  • Pricy but what a lovely cutting board
  • Very moving and honest interview with Rob Delaney on grief.  I loved the series Catastrophe (that Rob Delaney co-wrote and starred in).  This is a side of his life I didn’t realize he was going through while filming that series

Happy Friday!  I have one of those lovely, unstructured weekends this week.

This week felt kind of stressful.  Nothing in particular.  Mostly waiting to hear back from companies that I’m interviewing with which is an interminable process.  I have had two solid No’s which was disappointing to say the least.  In both cases they had to pull the job posting and ended up not hiring anyone.   I have another one that looks really promising where I’m supposed to go to the next level of interviewing but they haven’t gotten back to me to set that up.

It’s all very draining and demoralizing and to be honest I’m feeling very much in the dumps.

I’m hoping an easy weekend just puttering around will pull me out of this mood.  I have some plants that I need to get into pots and I have a dollhouse project I’m working on.

On that cheery note…

Have a lovely weekend!

May 3, 2019 12:01 am Andrea Filed Under: Favorites

Free Desktop calendar – May

Clean bright desk

Continuing with the free desktop calendar downloads for May.  This time with a grungy theme.  And, as always, my monitor photographs much pinker than real life for some reason.

These are all rendered in 1920 x 1080.  To save the image click on the link and the image will open in a new tab.  Right click on the image and select “Save image as…” and save to your computer.

I’m not sure how to update a background on a Mac but on a PC you right click on your desktop background and select “Personalize.”  You can then browse to the file location of the picture you want as your background.

Lavender Grunge desktop calendar

Grey Grunge desktop calendar

Blue Grunge desktop calendar

I hope you enjoy!


May 1, 2019 12:01 am Andrea Filed Under: Musings

Aging a terracotta pot

aged pot

I found a really pretty pot at our local Home Depot.  It has a ruffled edge detail that I really like and isn’t like your standard clay pot the big box hardware stores tend to carry.

The only thing I didn’t care for was the color.  We just aren’t terracotta people.

The pot is some sort of composite that feels like lightweight clay.  It doesn’t feel like plastic or resin – I don’t know what it is made out of but one of the selling points is that it is shatter resistant and can stand up to a freeze.  The blurb on the Home Depot website says “Made using a strong construction of minerals that is ecologically friendly.”  So there is that.

It is 13.5″ tall and has a small drain hole in the bottom.  And the best part (other than the scalloped edge) is it was just $11 and change.

Okay let’s deal with the color.  I have done this exact same method to another terracotta planter with great results.  I apply a base layer of grey paint that is meant to be used outdoors.  It is by FolkArt and I imagine I probably got it at Michael’s or Joann.

I start by painting the inner rim first, down about three or four inches.  The dirt will come up over the edge so you won’t see any terracotta.

Once the inner rim is dry I flip it over and paint the outside.  It looks shiny and you can see the brush strokes when it is wet but it dries very matte and the strokes are barely visable.  It looks a lot like chalk paint, actually.

The next step is a bit scary.  You need to slap on a layer of antique wax and them immediately wipe it off.   The wax is also by FolkArt.  I think to call it wax is a little misleading.  It’s not like the Annie Sloan wax or other finishing waxes I’ve used.  It’s more like a thin paint.

You really need to work fast.  Actually you can apply a layer of their clear wax first and then the antique wax and I think that gives you a little more control.  I had areas that soaked in a little more than I wanted.  After you apply the wax you take a rag and wipe away as much of the product as you can/want.

You would have thought I would take an after picture but I was excited to get it planted so you’ll have to make do with the glamour shots instead.   The combination of the grey and the antiquing make it look like it is an old cement pot that has weathered.

Other than the paint drying time this is a very quick project.  I think all told it took me about 60-90 minutes start to finish.


April 29, 2019 9:02 pm Andrea Filed Under: Crafts, Garden

« Previous Page
Next Page »

Primary Sidebar

How lovely to meet you!

Hi!  I am Andrea and I’m so glad you have stopped by.  click to read more

Subscribe to be notified of new posts!

Loading

Archive

Search

© Copyright 2016 · Pretty Lifestyle WordPress Theme by: PDCD