• Skip to primary navigation
  • Skip to main content
  • Skip to primary sidebar
  • Home
  • Catagories
    • Books
    • Crafts
    • Dollhouse
    • Favorites
    • Food
    • Garden
    • Holidays
    • House
    • Musings
    • Organize
    • Places
    • Shopping
  • Contact
  • Nav Widget Area

    • Email
    • Instagram
    • Pinterest

Under a Blue Moon

Decor, cooking, organization, all the pretty things

Content/Sidebar/Sidebar

From the Infirmary

Guest room

Current view.  I’ve got nothing today.  I started coming down with the flu last Tuesday and feel no better today than I did then.  If anything I might feel worse.

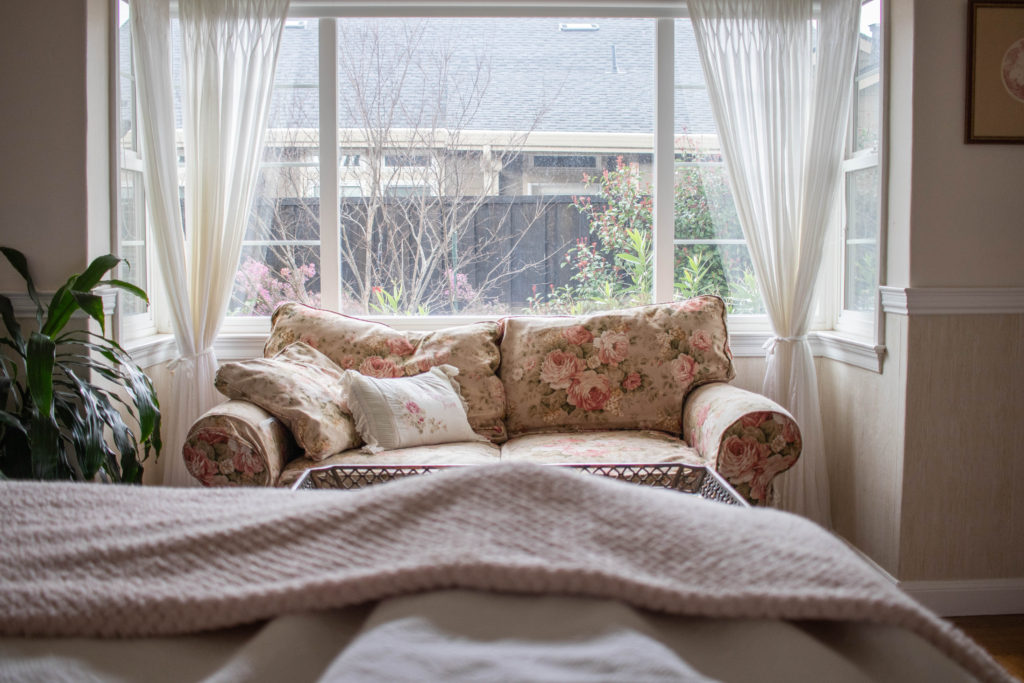
I’ve even taken to the guest room so Rick doesn’t have to hear me hack and cough all night.   I will say the guest room bed is really comfortable.  They say you should always spend the night in your own guest room so you can experience what your guests will.  I promise the bedding will be freshly laundered if you come stay with us.

I am one of those people that preaches how important it is to get a flu shot every year.  I pride myself on not having been sick in years (except for one, very unfortunate, food poisoning incident that happened about three years ago).  This flu season, however, I did not get a shot.  It was a combination of insurance changing, my doctor retiring and no longer working near the clinic with drop in flu shots.

But in the end I have no one to blame but myself.

Okay enough of that.

I’m hoping that I round some kind of corner in the next day or two so we can resume normal activities around here.  Until then, Happy Wednesday.  Get your flu shot.

March 6, 2019 12:01 am Andrea Filed Under: Musings

Doll House Chronicles – Part 1

Dollhouse furniture

I’m going to start a new series showing the progress on the doll house.  I’ve been procrastinating because I have a ton of work that needs to be done on the house and I don’t even know where to start.

This series will chronicle my progress, both with the house and with its furnishings.

I’ve actually  made the optimistic step of moving the doll house to my work table so it is easy to access and work on.

Edited to add:  I just realized I’ve never really shown a picture of the doll house on the blog.  It’s in a few background shots of the office but never a close up.  I’ll do that next week so you can see what I’m working with.   I think I have some pictures of when I first bought it off of Craigslist in all it’s Pepto pink and cobalt blue glory.

Doll house before

Last week I spent a couple of days working on fixing up some furniture that was given to me.  My friend gave me a couple of sets of furniture that her mother had in storage.  I have no idea how old they are but the sets were originally $5.99 each and between the two there are about 15 pieces.  Below are some of the wooden pieces.

Dollhouse furniture before

As you can see the quality is pretty poor but I think I can refurbish a few of them to work in the house.  What is weird is some are 1:12 in scale but there are a number of pieces that are smaller.  Like the vanity above.  It is just a tiny bit higher than the coffee table.

What I worked on was an armoire, a coffee table and a couch.  Let’s take a look at the couch first.

Red dollhouse couch

Yikes.  That is bright.  I do like the shape of it though.  I started by taking it completely apart.

Deconstructed dollhouse couch

I removed the red velvet from all the pieces except for the seat cushion and the backing on the couch.  Those I covered with a thin, light colored felt material to both block the red and add a little additional padding.

I then recovered everything in a flax colored linen material.

One thing I struggle with when it comes to upholstered doll house furniture is the thickness of the fabric can look odd to me.  There was a strange gap between the cushion and the bottom of the couch and the backing pieces.  To disguise it I took a thin scrap of the linen and glued a piece of string down the center of it.  I then folded it over and made sure the material was snug against the string.  I trimmed the excess and had a nice, to scale, length of welting.  I tucked the raw edge into the gap and I think it gives the piece a more finished look.

welting

Here is how it looks.  I also made a wee little throw pillow.

Doll house couch close up

The next thing I worked on was the armoire.

Dollhouse armoire before

It also has a nice shape but the finish is awful and it needed some smoothing of edges.  As you can see the hardware was already falling off (probably from spending decades in storage).  I removed the rest of the hardware and gave the piece a good sanding.  Then I put on the first coat of chalk paint.  Yikes again.  Look at that bleed through.  That is supposed to be white chalk paint.

Dollhouse armoire primered

I gave it a quick coat of shellac primer which helped on the outside but the inside was still bleeding through so I just went with it.  Let’s pretend I wanted the inside to be a rosy color.

It didn’t come with glass or plastic in the doors so I fashioned some screening (gutter guard actually) in its place.  I gave both the screening and the hardware a light coat of rose gold metallic paste.

Dollhouse armoire

I think this will store linens in the upstairs hallway.

The final piece is a coffee table.  I ran into the same problem with bleed through and I actually resorted to coating the piece with clear nail polish (it was late and I’m sick so it was the best I could come up with.  Patience isn’t my strong suit).

doll house coffee table

I used earring backs and gold beads for the knobs on the drawer.

I’m not sure what other pieces I’ll try to rehab.  Maybe the grandfather clock and the side table.  I can also see using the other cabinet piece in the kitchen.

Stay tuned.


March 4, 2019 12:01 am Andrea Filed Under: Dollhouse

Friday Favorites

Photo collage

   Reading Material  ◊  scalloped fabric garland   ◊  Untitled   ◊  Enamel Bowls

  • Some days you just need to start your day on a positive note
  • If you like miniatures and doll houses then this Instagram account is for you:  @mini_home_beautiful.  It features miniature interiors from all over and all photos are credited to their original owners so you can find even MORE accounts to follow.  Down a rabbit hole I go….
  • Some pretty pink things:  Gorgeous small box that looks like it is made out of pink mother of pearl (actually it’s resin) and pretty pink dishes.  Ice cream anyone?
  • I am a longtime fan of Benita Larsson.  I used to follow her blog and was broken hearted when she ended it back in 2013 (It’s still up to read).  She has a new YouTube channel where she shares her tips for organization and cleaning.  Even if her minimalist style isn’t your thing you can certain appreciate how exceptionally tidy her home is.

Happy Friday!  How has your week been going?  Can you even believe it is already March?  I can’t.

I came down with some sort of crud on Tuesday and I’m still battling it.  It can’t decide if it is a cold or the flu.  Just general sore throat, overall achiness and fatigue.  All I’m good for is sipping tea and rewatching the Gilmore Girls.  Who, in retrospect, are rather annoying but I want to live in Stars Hollow so I keep watching.

Unless I snap out of it that is the plan for the weekend.  I hope your plans are more exciting!

Have a lovely weekend.

March 1, 2019 12:01 am Andrea Filed Under: Favorites

Desktop calendar – Free!

(Vanity chair making a guest appearance since my desk chair isn’t camera ready…)

This year I have been making my own desktop calendar to use as my background on my computer.  I figured I might as well share them with all of you in case anyone else likes that minimal look for their desktop or laptop screen.

I made three versions of it.  A pale gray (which is what is actually pictured above – for some reason my monitor always reads really pink in photographs), a dusty rose and kraft paper.

These are all rendered in 1920 x 1080.  To save the image click on the link and the image will open in a new tab.  Right click on the image and select “Save image as…” and save to your computer.

I’m not sure how to update a background on a Mac but on a PC you right click on your desktop background and select “Personalize.”  You can then browse to the file location of the picture you want as your background.

Gray desktop calendar

Dusty rose desktop calendar

Kraft paper desktop calendar

If this is something that is popular I’ll do it every month.  I’m going to do it for myself anyway so I might as well share!


February 27, 2019 12:01 am Andrea Filed Under: Musings

Vanity chair slipcover

I rarely show pictures of my bedroom, mainly because it is a bear to photograph.  It is on the north/east corner of the house so it tends to be really dark and then add in the windows which always get blown out in photos.  I did my best.

Anyway, this isn’t about the poor lighting in my bedroom.  It’s about a quick project I whipped out yesterday on a whim.  I have had this vanity chair for about eight years and when I first bought it I immediately painted it a champagne gold color to match the mirrored vanity and I reupholstered the back of the chair.  I just never got around to doing anything about the seat.

Rosie is here to supervise.  It was covered in a gold striped, satiny material that had seen better days.  I toyed with the idea of recovering the seat but then decided that the easier route would be to make a slipcover for it instead.

Since eight years had passed I have no idea where the fabric for the back came from.  It is a thicker cotton.  I just recently bleached a drop cloth for another chair recovering project and decided it was a close enough match.

To be honest, when it comes to making a slipcover for anything you just have to wing it.  I draped my fabric over the seat and made some markings and then just had at it.  This one was pretty straightforward.  I cut the corners off on the back and then pinned darts in the front.

When I hemmed those corner cutouts I reinforced the corner by stitching back and forth a few times.  The hem is quite narrow right there.

At first my plan was to make ties for the back but after trying it out I could see that the fabric was too stiff and my bow looked rather pathetic.

Plan B was to shorten the ties and use velcro to close them together.  Much tidier and better looking.

I also toyed with the idea for doing a box pleat ruffle along the bottom, but again, thought the fabric’s thickness wouldn’t lend itself to that application so I did a simple crotchet lace trim instead.   If I was to do it over I would have lowered the tabs on the back to be even with the bottom of the fabric (where the lace is attached) so I could extend the lace to the tabs.  Then the lace would overlap over the back legs.  Ah well.  Next time.

I did add pleats to the two front corners to add in a little bit of ease across the front.

All in all a pretty easy project.  It only took a couple of hours (if you don’t count the eight years it took to get started…).

February 25, 2019 12:17 pm Andrea Filed Under: Crafts

« Previous Page
Next Page »

Primary Sidebar

How lovely to meet you!

Hi!  I am Andrea and I’m so glad you have stopped by.  click to read more

Subscribe to be notified of new posts!

Loading

Archive

Search

© Copyright 2016 · Pretty Lifestyle WordPress Theme by: PDCD