• Skip to primary navigation
  • Skip to main content
  • Skip to primary sidebar
  • Home
  • Catagories
    • Books
    • Crafts
    • Dollhouse
    • Favorites
    • Food
    • Garden
    • Holidays
    • House
    • Musings
    • Organize
    • Places
    • Shopping
  • Contact
  • Nav Widget Area

    • Email
    • Instagram
    • Pinterest

Under a Blue Moon

Decor, cooking, organization, all the pretty things

Content/Sidebar/Sidebar

Dollhouse Before

White dollhouse

This is going to be a picture heavy post.  And not pretty pictures either but I wanted to document the before, in all it’s glory, before I get too far into the restoration.

First a little background on this house.  Two years ago someone I follow on Instagram for home decor had done pretty much a replica of her own home in dollhouse form and I was just smitten.  So I started researching all things dollhouse and quickly determined that this could be a very expensive and time consuming hobby.  I really wasn’t interested in building a dollhouse, to be honest, I just wanted to decorate one.   Then I read a blog post on Mockingbird Cottage who mentioned that she found an assembled one on Craigslist.

Hmmm.  I immediately hopped on my local Craigslist and as luck would have it there was one listed for sale!  It is a Greenleaf Beacon Hill which normally retails for about $250 (in kit form) and I got the assembled one for $80.

So thank you Claudia for the tip to look on Craigslist!  I don’t think it would have ever occurred to me.  Thank you also for your dollhouse sources page which I have found invaluable.

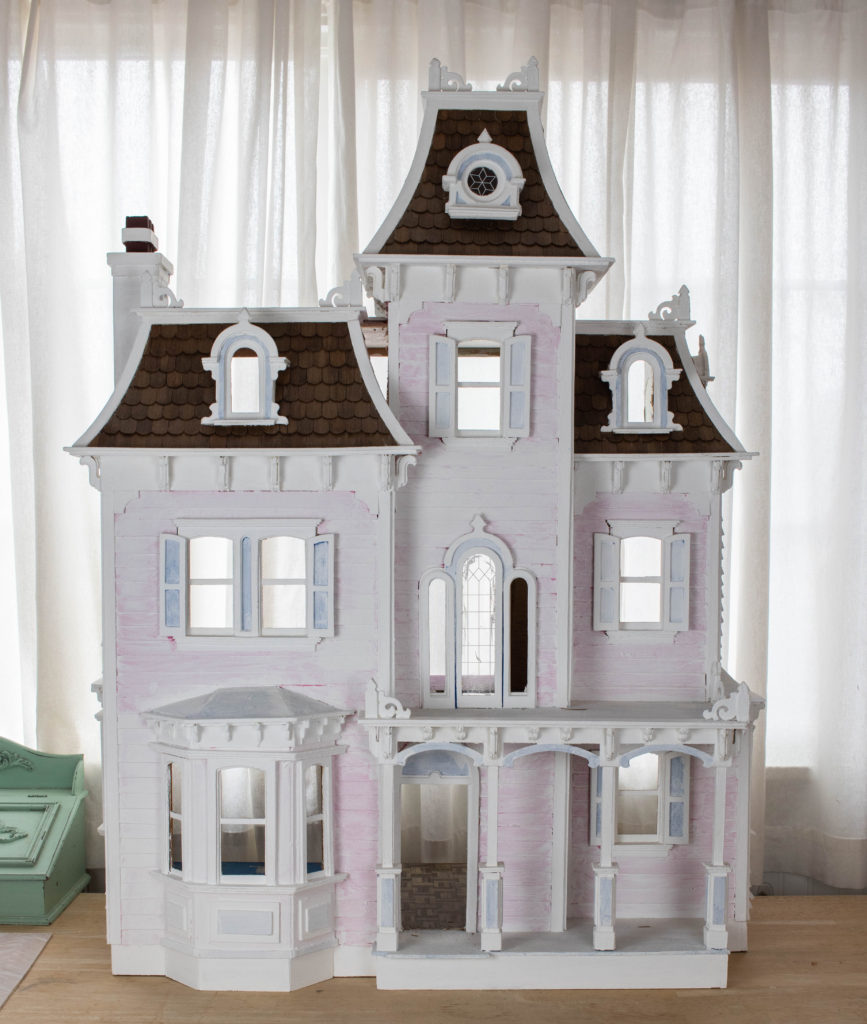
Here are the listing photos and what it looked like when I purchased it:

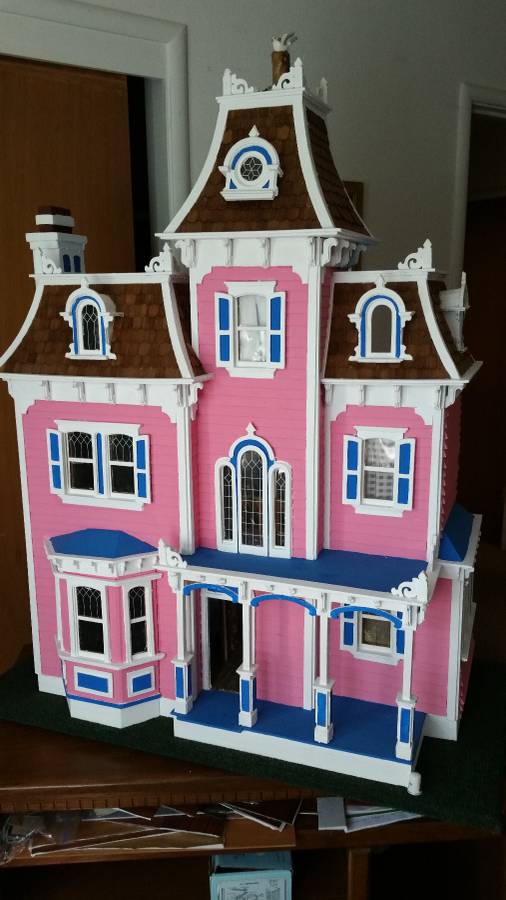
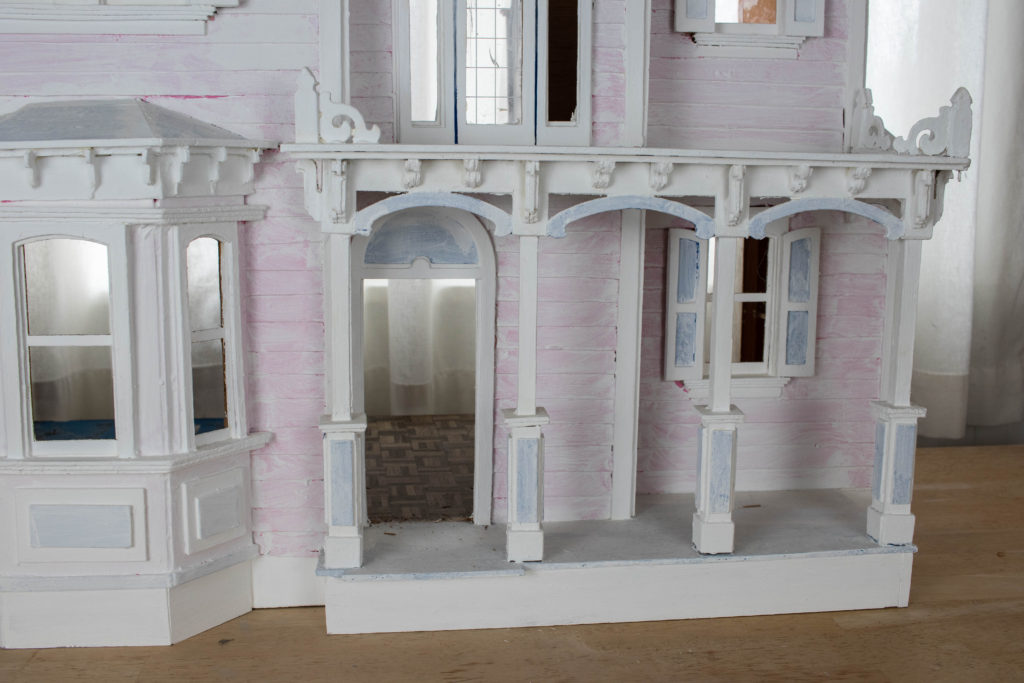
Gracious that is lurid.  As you can see from the first photo I have slapped a primer coat on the exterior just so it isn’t so eye searing while I am working on it in my office.

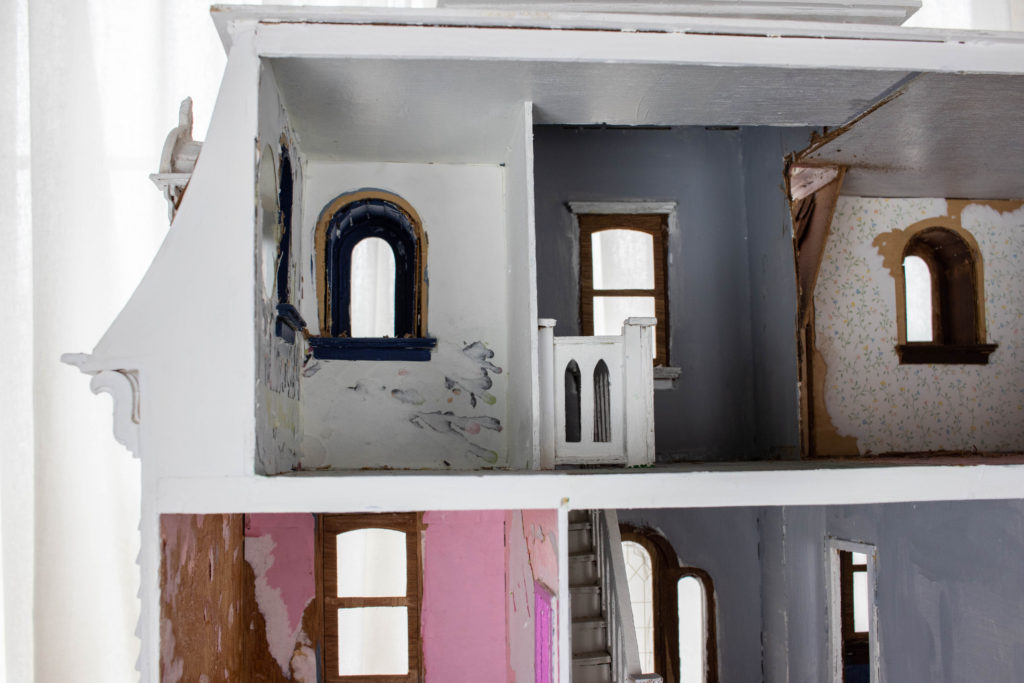
Here is the interior:

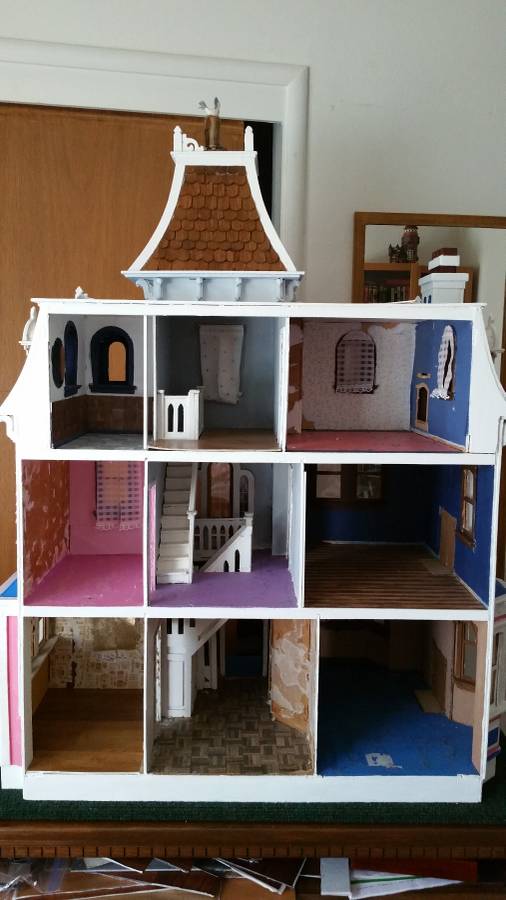
The woman who sold it to me had already begun some restoration work then decided she really didn’t have the time nor the space for it.

I decided to modify the layout somewhat.  I wanted a bigger living area so I removed the wall between the foyer (bottom middle) and the living room (bottom right).  After much deliberation I removed the lower staircase as well.  I know some miniaturists are going for realism but I honestly don’t care (or have the talent/patience) if it is completely accurate.  We’ll just pretend the staircase is there, but not visible.

I also removed the walls in the upper most level.  I want that to be a big attic space and not a series of rooms.

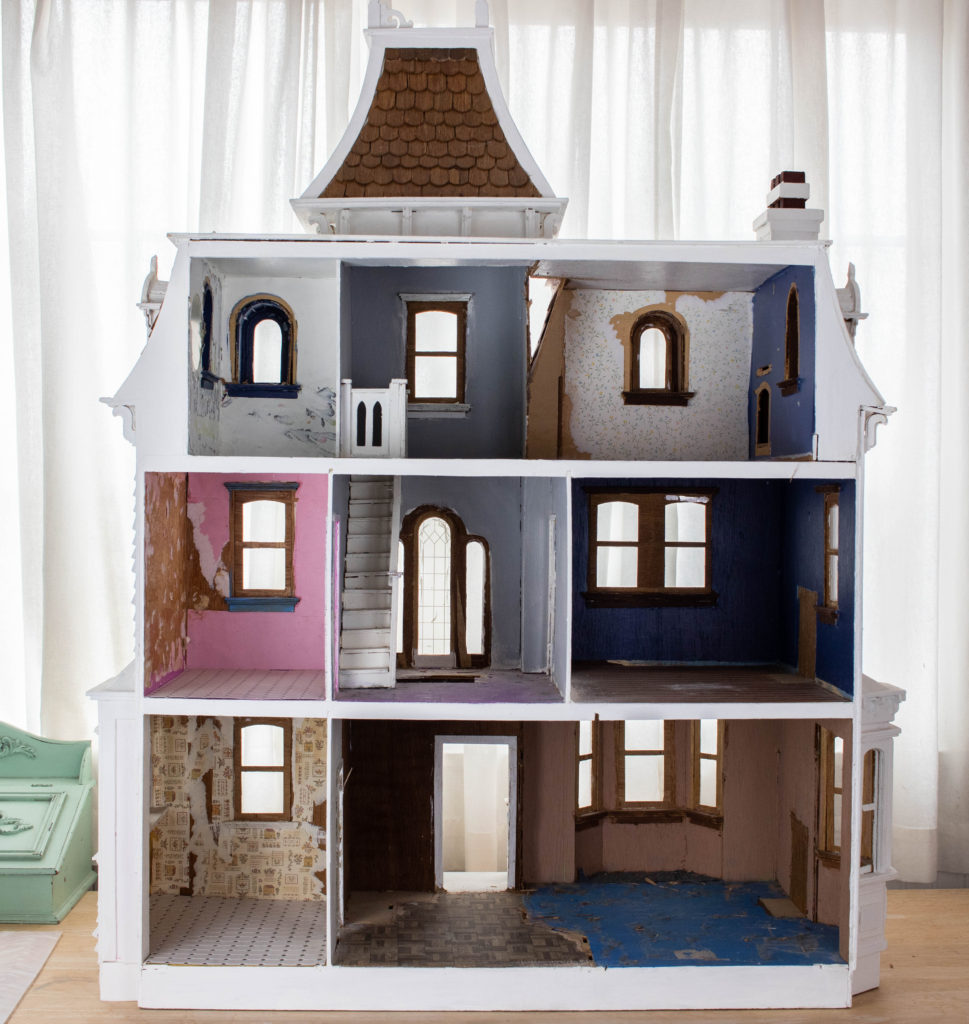
The construction of the house is rather slipshod and I ended up removing all the window casings and the acetate windows.  You can buy replacement windows from Greenleaf but I think I’m going to just leave them open.  I can make new casings for the windows fairly easily.

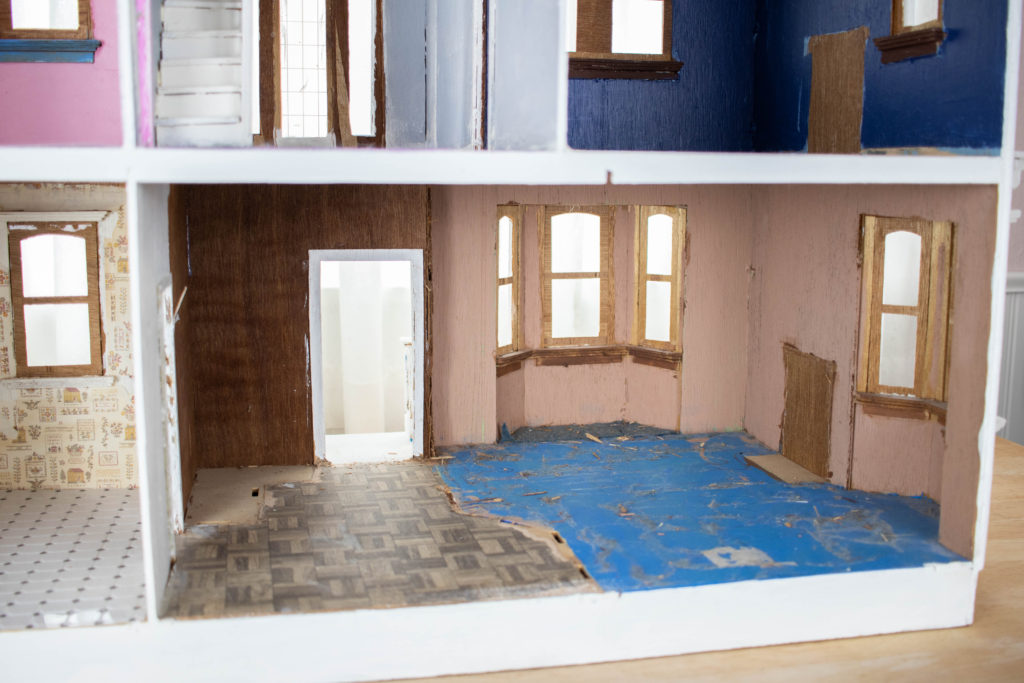
I am going to put wood floors in a herringbone pattern in the living room, upper hallway/stair landing  and bedroom.  I’ve actually already  made the floor for the bedroom but I need to apply a skim coat on all the walls in the house and paint before I install floors.   The attic will have a rough hewn wood plank floor.

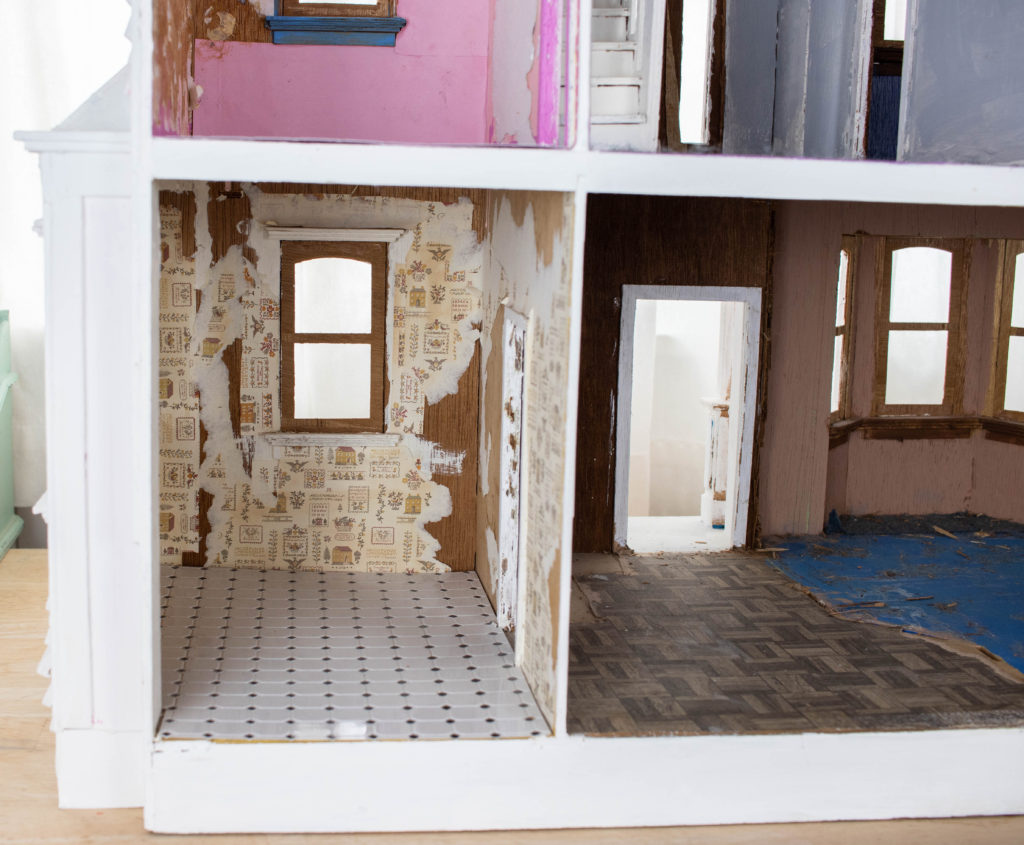
I bought flooring for the kitchen and bathroom.  I will need to put an underlayment before installing it so it is level with the adjoining wood flooring.

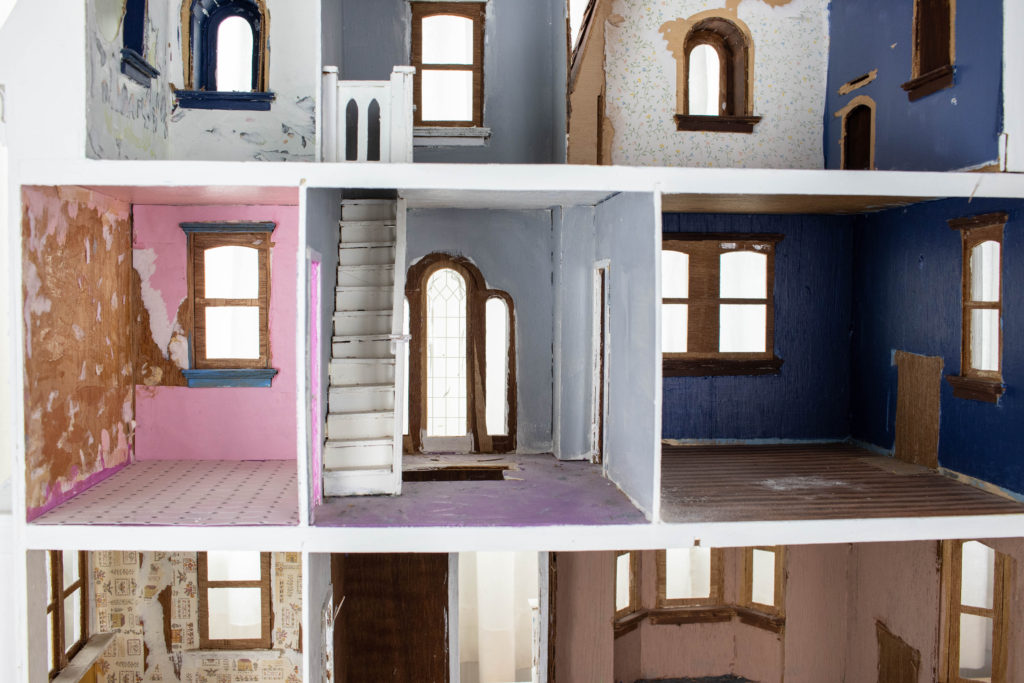
I think I’ll put a fireplace in the living room but not the bedroom or attic space.  The previous owner had removed all of them in her restoration efforts.  I feel they will take up too much room in the bedroom and will mess with my planned placement of furnishings.  And who needs a fireplace in the attic?

When I see all the work I have to do to get it inhabitable I realize it would have been quicker to just have started with a kit and built it myself.  Ah well.  I’m committed now.

The next step is to get the walls in order.  I am using joint compound for a skim coat because it’s easy to work with and sands really smoothly.  I do have a little patching I need to do in the attic where I removed a wall and opened up a hole to the outside.

I sure have a lot of work to do!  It’s rather daunting.  I have been buying and making the furnishings (mostly making) because that is the fun part and I don’t want to wait until it is completely restored to get to the fun part.  Hopefully the next post in this series will be the finished walls.  Stay tuned.

March 20, 2019 12:01 am Andrea Filed Under: Crafts, Dollhouse

Bottle Cap Pincushion

bottle cap pin cushion

Sorry for the radio silence on Friday.  We had our Granddaughter for the weekend and I neglected to plan ahead and schedule a favorites post.  I’m also a bit slow posting today.

I wanted to share a cute, simple project with you.  I had an image of the most adorable bottle cap pincushions pop up on my Pinterest page and had to recreate them.  My inspiration came from Tea Rose Home (a lovely blog that I’m happy to discover).

bottle cap pincushion

All you need is a bottle cap (like from a soda or water bottle), some fabric and some stuffing.  I created a 3″ circle template out of heavy cardstock which I traced on the back side of my fabric.

You sew a running stitch about 1/8″ from the edge of your cut out fabric, cinch it slightly, add some stuffing and then cinch it closed.

I added a few back and forth stitches before tying it off.  The trickiest bit was keeping the stuffing from coming out while trying to sew it closed.

Once it was stuffed and sewn shut I squirted some craft glue into the bottle cap and smooshed my little pincushion into it.  I added a little bit of decorative trim to finish it off.  Each one took about five minutes to make.

I think they would be so cute included in a little sewing related gift bag.

I made mine to be used on my sewing machine.  I added a small two sided adhesive square to the bottom and attached it to my sewing machine.  I have also seen versions where a loop of elastic was added to the bottom and worn like a ring.

Give it a try – I think you’ll find it as addictive as I did!

March 18, 2019 9:55 am Andrea Filed Under: Crafts

Creamy Zucchini Soup

zucchini soup

There is nothing more comforting than a nice creamy soup.  This soup was something my mother used to make and she had this ingenious way of semi prepping it and then freezing batches of it to have on hand.  The trick is to make it right up to the point you add the half and half and then portioning it and freezing it.  Then when you feel the need for cream of zucchini soup you just thaw the base, heat it up and add the half and half (or cream if you are feeling decadent) and serve with some nice crusty french bread.

It’s a very simple recipe and I think I’ve replicated it quite nicely.  I’ve added basil to my version which adds just the right touch of flavor to an otherwise bland vegetable.

zucchini soup ingredients

The beauty of this recipe is that the ingredient portions do not need to be precise.  A bunch of zucchini, some onion, chicken broth and half and half.

It calls for a small yellow onion but have you noticed how nearly impossible it is to find a *small* onion in the grocery store?  They are all huge!  Like softball size huge.  I did find a smaller one but if you can’t then just use half of a gargantuan one.

All you do is saute some onion and zucchini in a little bit of butter, add some chicken stock and simmer then just before you whir it all up add some fresh basil.  Add some half and half and dinner is served.   It is so delicious and so simple to prepare.

I do find that a dash of cayenne pepper does elevate the flavor of this soupd.

chopped zucchini and basil

Creamy Zucchini Soup with Basil

Creamy zucchini soup is elevated with a bit of fresh basil.
Print Recipe
Servings: 4
Course: Appetizer
Ingredients Method

Ingredients
  

  • 1 small yellow onion, chopped
  • 3-5 zucchinis Depending on size, use 3 to 5 zucchinis. Chop them into small pieces.
  • 2 tbsp butter
  • 4 cups chicken broth or stock
  • 12 oz. half and half
  • 1/3 cup chopped basil
  • 1 tsp salt
  • pepper to taste
  • dash cayenne pepper

Method
 

  1. Melt butter in stock pot.
  2. Add chopped onion and saute for five minutes until translucent
  3. Add chopped zucchini and salt and saute for an additional five minutes until softened
  4. Add chicken broth and peppers and bring to a boil. Turn down and let simmer for 20 minutes
  5. Remove from heat and add chopped basil. Purée with an immersion blender, or, if you don't have an immersion blender (which you need to make your life complete), then purée in batches in a blender.  At this point you can freeze the base and then reheat before adding in the half and half.
  6. Add half and half and bring back up to a simmer
  7. Taste for salt and pepper and adjust to taste. Serve hot

Since zucchini (at least in California) is available just about any time you want, this can be made any time of year.  If you have a particularly good crop of zucchini then you can freeze the base and pull it out during the winter when you are craving the taste of fresh vegetables.  Serve it with grilled cheese sandwiches or a nice crusty loaf of bread and you have the perfect, simple meal.

table setting


March 13, 2019 12:01 am Andrea Filed Under: Food

Back amongst the living…

Easter decor

Isn’t amongst a word?  Spell check is picking it up as suspect.  Well I’ve always used it and it’s too late to try to change me now.

I turned the corner this weekend.  By Saturday afternoon I was getting some energy back and not coughing nearly as much.  I think it helped that I finally got a good night’s sleep the night before.

On Sunday I pulled out my Easter decorations and started playing around with them.  I really don’t have much in the way of Easter related decor so it’s hard to come up with new and interesting ways to display them.  I had this very inexpensive cloche that I bought at Michaels around Halloween.   The base was originally black but I spray painted it a dull gold color.  I think my *Unibomber bunny looks great under glass with a little nest of moss and a fern frond.

*When my dad saw the bunny he asked “Is that a bomb on his back??”  So it’s the Unibomber bunny forevermore.

Do you decorate for all the holidays?  Some of the holidays?  None?  I only decorate for Easter, Halloween and Christmas.  Although occasionally I add some small american flags to the mix around the 4th of July.  I have one box for Easter decorations, three or four for Halloween and a bojillion for Christmas.

Maybe I’m giving the other holidays short shrift.

Although, in my defense, I did buy a shamrock plant on Saturday so I’m counting that as decorating for St. Patrick’s day.

cream roses

I have been loving these pale roses lately.  They are just the most delicate shade of blush.  I’ve been getting them at Trader Joe’s and they have had this same color for a few weeks now.  Here’s a tip for you when buying cut roses:  Pinch the buds.  They should be very firm, bordering on hard.  If they are at all squishy pass them by.  It means they aren’t all that fresh and will wilt quicker.

The weather promises to be good this week so maybe I’ll get out there and prune my rose bushes and do some weeding.  Happy Monday everyone!


March 11, 2019 11:51 am Andrea Filed Under: Holidays

Friday Favorites

Photo collage

Untitled  ◊  Let’s go find a rainbow  ◊  Untitled  ◊  disturbed

Oh goodness.  This flu/plague is hanging on for dear life.  I start to feel better during the day but then night time rolls around and I’m up half the night coughing.

This is day 11 by my calculations.   I have this theory that my body has been saving up for all the years I haven’t been sick and is walloping me with it now.

I hope to be back to a normal routine next week.  Sorry to be on here all complainy and snozzly.

I hope you have a lovely weekend.

March 8, 2019 10:43 am Andrea Filed Under: Favorites

« Previous Page
Next Page »

Primary Sidebar

How lovely to meet you!

Hi!  I am Andrea and I’m so glad you have stopped by.  click to read more

Subscribe to be notified of new posts!

Loading

Archive

Search

© Copyright 2016 · Pretty Lifestyle WordPress Theme by: PDCD